


I will concentrate on the bell first. You need to be able to tie a ribbon from your object to hang when it's completed. Luckily, the bell had two small holes in the upper back where the ringer inside is attached.


Supplies needed are a button, decorative or plain paper, old spool that you would normally throw away, the bell in my case and 1/4 inch ribbon.


I then glued the spool to the bell using hot glue. This just keeps it stable because it wanted to rock inside the bell.

This is where you can get creative. Gather together your supplies for what you want the tassel made from. In this case, I wanted fringe as a base, then ribbon and finally a piece of feather boa was used. This is also a good way to use up scrap ribbon since it doesn't take much.

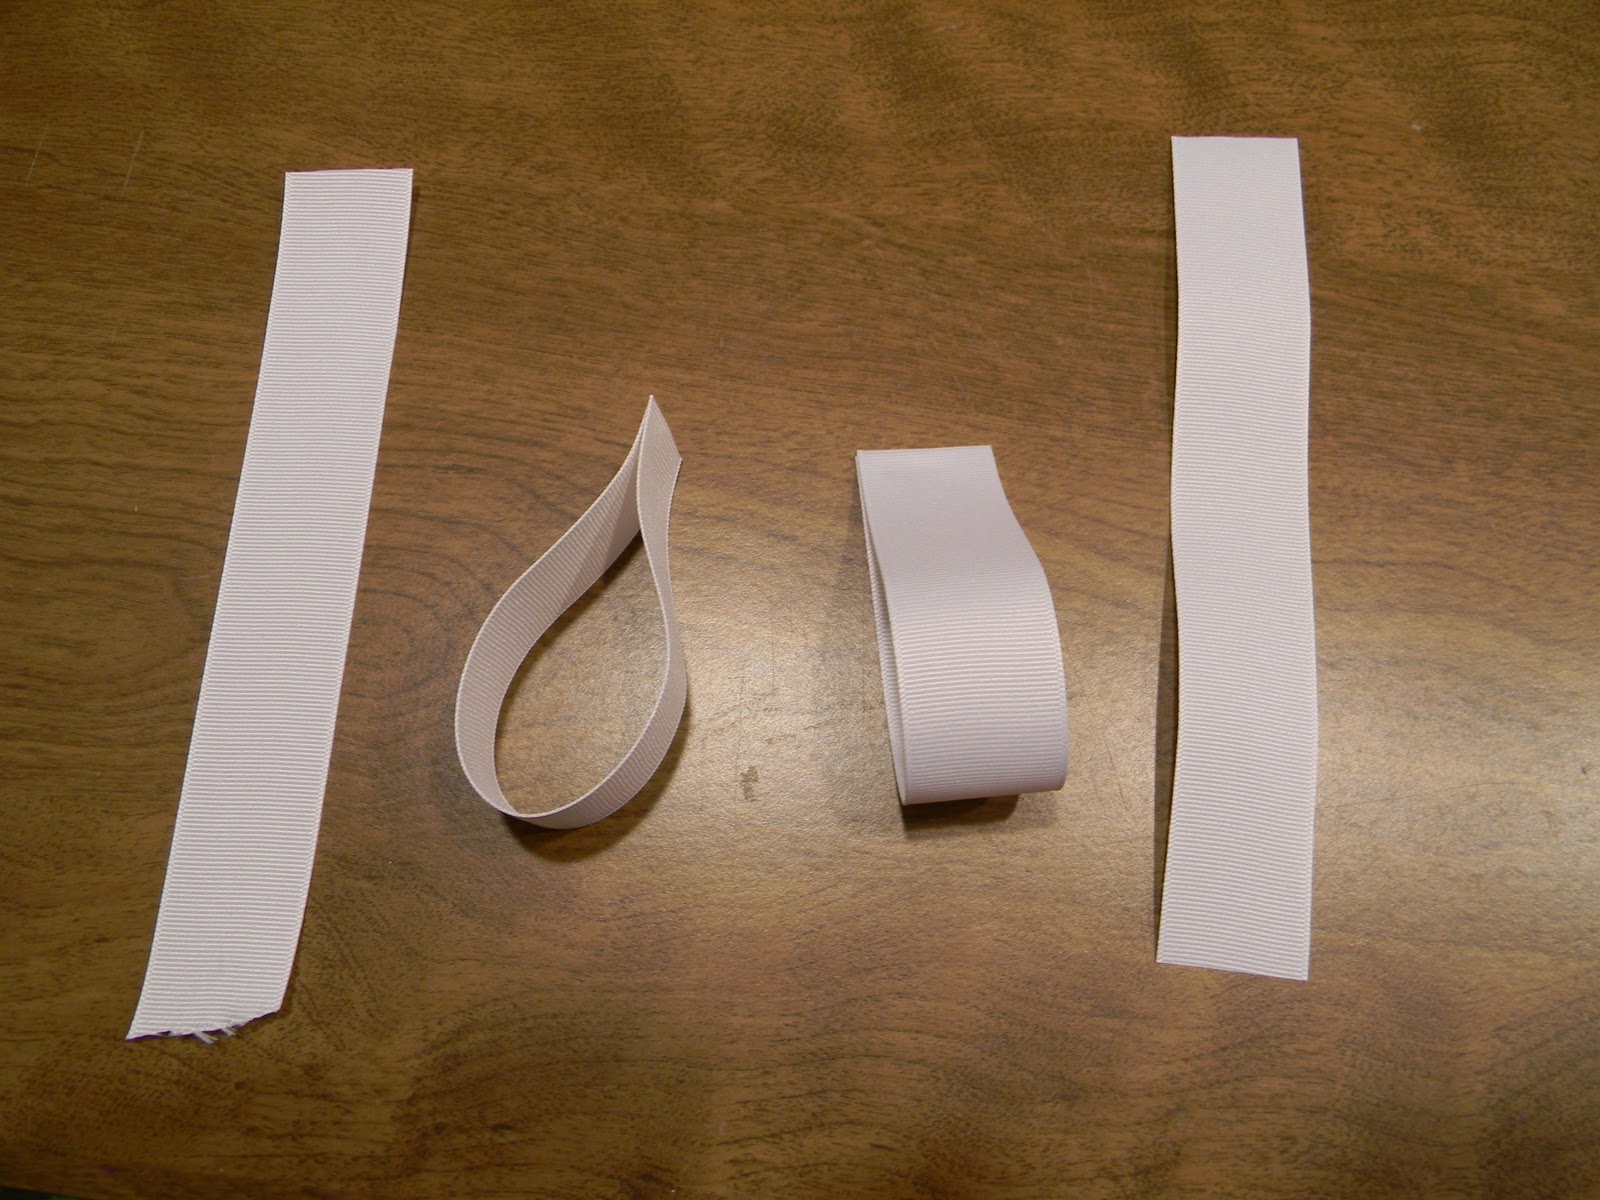

Keep layering. Your next row of ribbons would need to be glued in the open spaces between the previous ribbons.

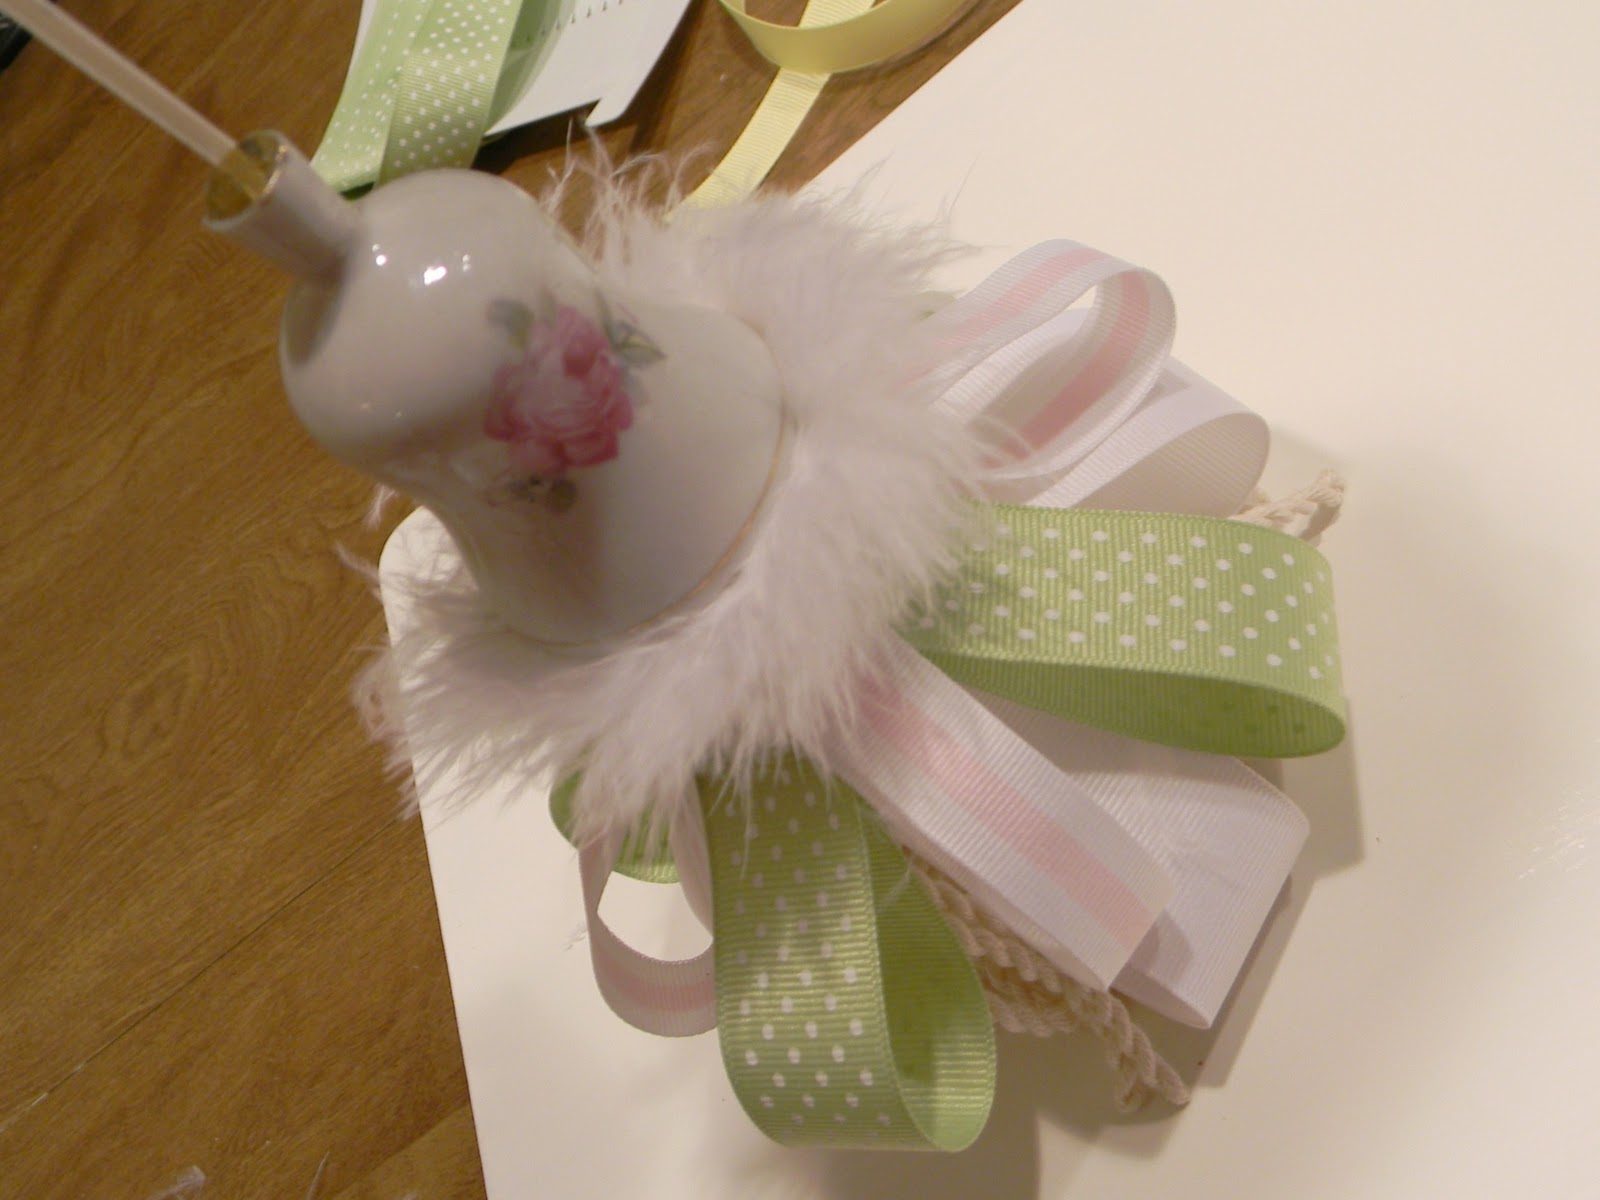
Final step was to add a bow to the ribbon up top to make it look pretty. This is an area where you can do whatever floats your boat. Be creative.

Okay, back to the bunny. He didn't have any way for me to thread a ribbon all the way through him, so I used a screw eye, screwed and glued between his ears.


Tassels can be made in various ways. I have just shown you ONE way to easily build a tassel tail by just gluing layers of ribbon or fringe on a spool.
Please try this. It is not only fun and creative, but inexpensive and impressive. Hang it from a door knob, a dresser knob, a curtain, a lid on the wall like I did or just anywhere. Trust me, these are so easy, you will get addicted!!

NOTE: You should be able to click on most of the pictures to enlarge to see further details.
These parties I love to link up to or check out my Blog Parties tab
Metamorphosis Monday @ Between Naps On The Porch
Make It For Monday @ Cottage Instincts
Motivate Me Monday @ Keeping It Simple
Just Something I Whipped Up @ The Girl Creative
Making The World Cuter @ Making The World Cuter
Twice Owned Tuesday @ House Of Grace
Nifty Thrifty Tuesday @ Coastal Charm
Power Of Paint @ Domestically Speaking
White Wednesday @ Faded Charm
Wow Us Wednesday @ Savvy Southern Style
Piece of Work Wednesday @ Primitive & Proper
Good Life Wednesday @ A Beach Cottage
Strut Your Stuff Thursday @ Somewhat Simple
Transformation Thursday @ The Shabby Chic Cottage
100 Ideas Under $100 @ Beyond The Picket Fence
Time Travel Thursday @ Brambleberry Cottage
Show And Tell Friday @ My Romantic Home
Furniture Feature Friday @ Miss Mustard Seed
Frugal Friday @ Shabby Nest
Vintage Inspiration Friday @ Common Ground
Creative Girls Blog Hop Friday @ The Girl Creative
Saturday Nite Special @ Funky Junk Interiors
Strut Your Stuff @ The Saturday Morning Blog
Show and Tell Saturday @ Be Different, Act Normal
Sunday Showcase Party @ By Stephanie Lynn
DIY Project Party
Sew Darn Crafty @ Sew Many Ways


0 comments:
Post a Comment